Prequisites
Getting started
When I started working in Web Development back in 1996, there weren’t many suitable apps for setting up a local web environment. One of the first Apps I used was Macromedia Dreamweaver, it was web development at it’s most basic.
When MAMP came out on the Mac, it changed everything, it allowed me to run a local LAMP stack at a click of the button. From MAMP I moved on to use Vagrant and Virtual Box, which needed more configuration than MAMP but gave me better control of my local infrastructure (make sure you have Docker installed):
This tutorial will get you up and running with Angular and Docker to create a small web application.
What is Docker
Docker enables you to run your application in containers. This means that your web application and all dependencies - can be packaged and easily moved from one system to another.
Docker fits nicely within modern front-end development workflows. You can package your Dockerfile and other files right with the code of your project and check it into source control. This makes moving your development to another machine so much easier, and it also makes sharing your development environment with your team easier.
Installation
Hopefully you’ve installed Docker, you can test the installation by running.
$ docker --version
Docker version 17.12.0-ce, build c97c6d6
You should see the version number of your Docker build. Before we get in to setting up a web server, we will do a quick test and run the standard ‘Hello World’ Docker Image.
docker run hello-worldYou should see the following in your terminal.
Unable to find image 'hello-world:latest' locally
latest: Pulling from library/hello-world
ca4f61b1923c: Pull complete
Digest: sha256:ca0eeb6fb05351dfc8759c20733c91def84cb8007aa89a5bf606bc8b315b9fc7
Status: Downloaded newer image for hello-world:latest

Hello from Docker!
This message shows that your installation appears to be working correctly.
...
Now that you have Docker running and working correctly we will move on to get our
cool new app up and running.
So let’s get started, I usually keep all my projects in a single folder on my
Mac called Sites. In your Sites folder create a new Angular project by
running the following command.
ng new docker-appDevelopment
I’m not going to go into detail about setting up Angular, I will cover Angular in depth in a separate post.
Let’s run the Angular local development server to check everything is working.
ng serve -oAdding Docker
So we now have Angular up and running, we’ve downloaded Docker and tested it locally.
The next step is to create a Dockerfile. A Dockerfile defines what goes in the environment inside the container. In the root of your application directory, create a file called Dockerfile and add the following to the file and save it.
# Pull the latest Node image from Docker
FROM node:latest

# Copy the current directory contents into the container at /app
COPY ./ /app/

# Set the working directory to /app
WORKDIR /app

# Install Node Modules
RUN npm install

# Make port 4200 available to the world outside this container
EXPOSE 4200/tcp

# Start Angular in Watch mode
CMD ["npm", "start", "--", "--host", "0.0.0.0", "--poll", "500"]
Build the App
We are ready to build the app. Now run the build command. This creates a Docker
image, which we are going to tag using -t so it has the name docker-app.
docker build -t docker-app .Run the App
Now we can run the app, mapping your machine’s port 4200 to the container’s
published port 4200 using -p:. The machines port is configured in the Dockerfile.
The -rm flag is used to remove the anonymous volume when the image is detached.
We will also mount the volume of our local src directory using the -v command.
Now any updates we make locally will be made on the Docker container.
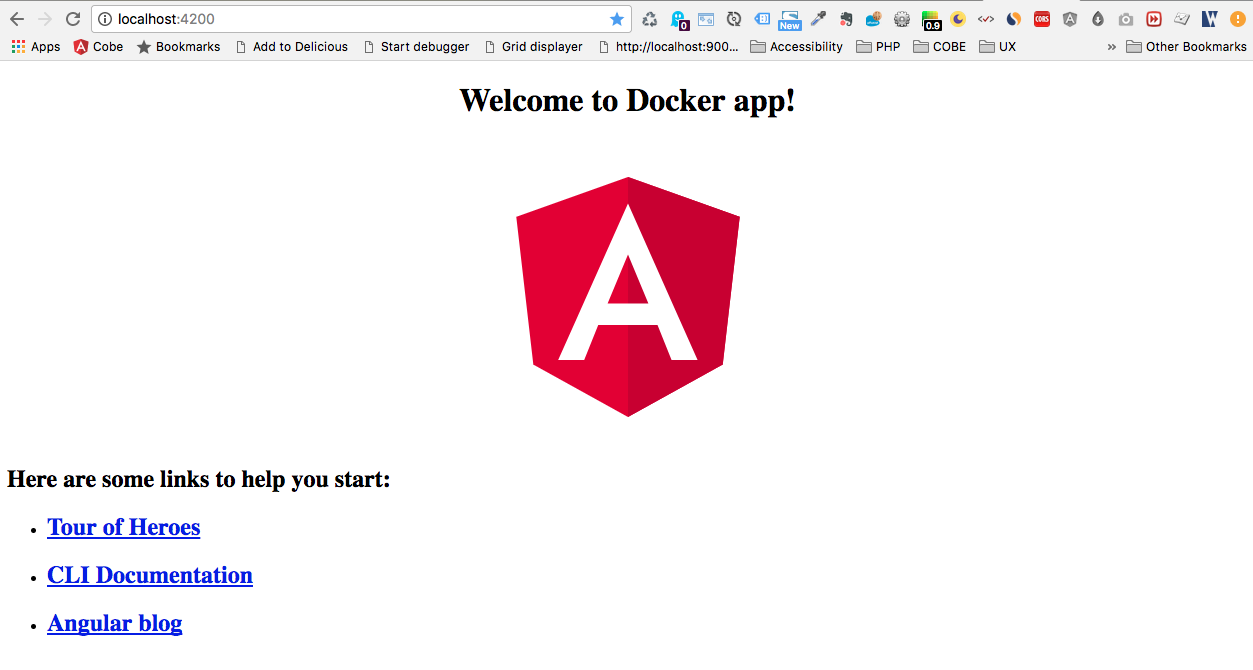
docker run -it --rm -p 4200:4200 -v $PWD/src:/app/src docker-appYou should be able to see the Angular app running by visiting localhost:4200
in your browser.
You can check to see what containers are running by using the container ls
command, you should see docker-apprunning.
~ docker container ls
CONTAINER ID        IMAGE               COMMAND                  CREATED
8ce32b2ed379        docker-app          "npm start -- --host…"   9 hours ago
You can now use the docker container stop command to end the process,
using the CONTAINER ID.
docker container stop 8ce32b2ed379Next steps
So we’ve created a simple Angular app which runs in a Docker container, we can
expand the app by adding a service, add aditional containers using docker-compose.
We could also add a database container, a Rest API and create a MEAN stack for local development.